Best Heat Set Inserts for 3D Printing (2026): Kits, Sizes and Installation Tools
By Chris Avery, Publisher / Editor
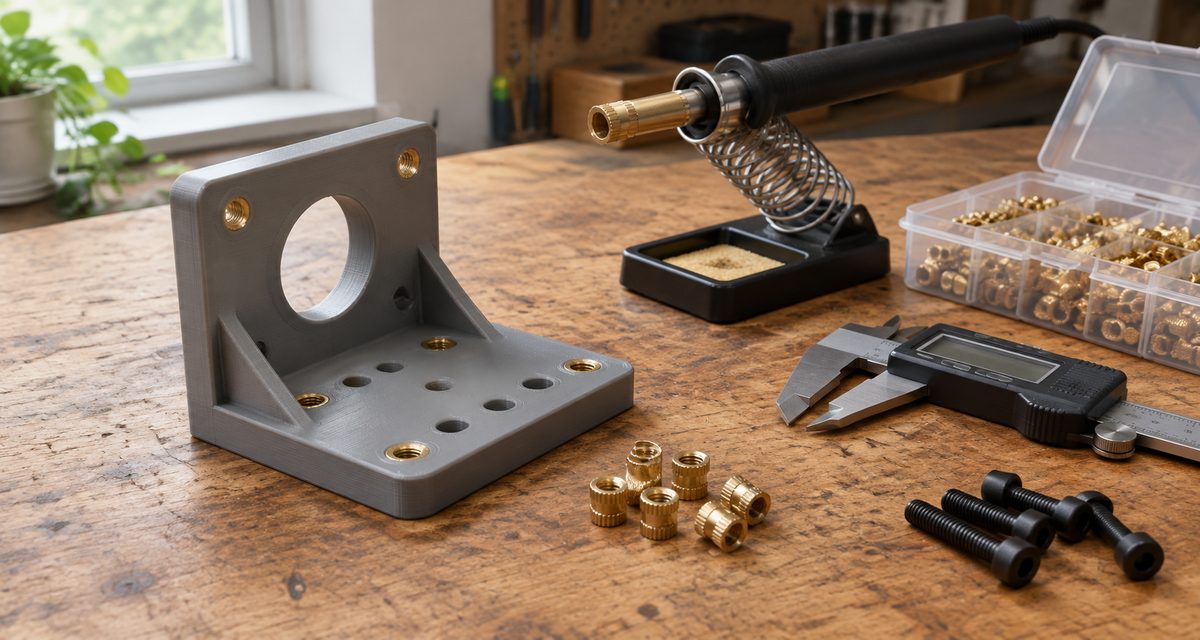
Heat set inserts are small brass sleeves you melt into a printed part to give it real metal threads. They are the difference between a screw hole that strips after a few uses and one you can open and close for years. Getting them right comes down to three things: the insert, the hole you model for it, and the heat you install it with. This guide compares four insert options and two installation tools, then covers sizes, temperatures, hole design and the mistakes that make inserts pull out.
Quick Answer
The best heat set inserts for most people are a brand-name kit whose maker publishes hole sizes, such as the ruthex M2–M5 assortment bundled with insert tips. Install them with a temperature-controlled soldering iron and a tip that fits the insert, set a little above the filament's print temperature. Model the hole from the insert maker's drawing (ruthex specifies 4.0 mm for its standard M3) and make it at least 1 mm deeper than the insert.
Amazon buttons open Amazon.com search results for that exact product name in a new tab, not a single product page. Results can include other pack sizes, variants and similar items, so match the brand, sizes and quantity before you buy. Amazon affiliate links. As an Amazon Associate I earn from qualifying purchases.
TL;DR — Quick Summary
Best Heat Set Inserts and Tools — 2026 Picks
- 1🏆 Best overall kit: ruthex M2–M5 Assortment + 7 Insert Tips — published hole chart, tips included
- 2💲 Best budget kit: Ktehloy 400-piece M2–M6 assortment — lots of inserts, no tips
- 3🧰 Best for beginners: FFVRVSS 600-piece M2–M6 kit — inserts, six tips and an adapter
- 4🔩 Best brass inserts: Initeq M3 Long — CDA 360 brass with a published hole size
- 5🔥 Best installation tool: Hakko FX-888DX — 50–480°C temperature control, T18 tips
- 6🎯 Best insert tips: HANGLIFE M2–M8 tip set — for T18, 900M and Weller SP40NUS style irons
What is Heat Set Insert?
Heat Set Insert A knurled metal sleeve, usually brass, with a machine thread inside. You heat it with a soldering iron and press it into a slightly undersized hole in a thermoplastic part; the plastic melts around the knurls and grips the insert when it cools, giving the part a durable metal thread for machine screws.
🛠️ Printing parts that have to take a load?
Inserts only help if the plastic around them is strong enough. Our functional-parts guide covers which filaments to use for brackets, mounts and housings.
Heat Set Inserts and Tools Compared
Specifications below come from each maker's data sheet or product page, or from the product's Amazon.com listing where the brand publishes nothing else, checked on November 20, 2026. We do not publish prices; the buttons open current Amazon listings.
Best overall heat-set insert kit
ruthex M2–M5 kit + tips
Sizes: M2, M3, M4, M5 inserts; M2–M8 tips
Included: 270 inserts, 7 tips, iron adapter
Read why we picked it →Best budget heat-set insert kit
Ktehloy 400-piece kit
Sizes: M2, M2.5, M3, M4, M5, M6
Included: 400 inserts (no tips)
Read why we picked it →Best assortment for beginners
FFVRVSS 600-piece kit + tips
Sizes: M2, M2.5, M3, M4, M5, M6
Included: 600 inserts, 6 tips, iron adapter
Read why we picked it →Best brass threaded inserts
Initeq M3 long inserts
Sizes: M3-0.5 (one size per pack)
Included: Inserts only, in several pack sizes
Read why we picked it →Best installation tool
Hakko FX-888DX
Sizes: Takes Hakko T18 tips
Included: Station, FX-8801 iron, holder, T18 tip
Read why we picked it →Best soldering iron tips for inserts
HANGLIFE insert tips
Sizes: M2, M2.5, M3, M4, M5, M6, M8
Included: 7 brass tips
Read why we picked it →The Best Heat Set Inserts and Tools
The first four picks are inserts; the last two are what you install them with. Most people need one insert kit plus either a tip set for an iron they already own or a temperature-controlled station. We have not lab-tested these products: specifications come from the makers or, where a brand publishes nothing else, its Amazon.com listing, and we say which is which.
Brand-name insert kit with installation tips
ruthex Threaded Inserts M2–M5 Assortment Box + 7 Heat-Set Insert Tips (Bundle)
Best for: Most people who want one kit that covers the common sizes and comes with a published hole chart. Sizes: M2, M3, M4, M5 inserts; M2–M8 tips.
The best heat-set insert kit for most people is one whose maker publishes exact dimensions, because the hole you model decides how well the insert holds. ruthex, a German insert maker, publishes a drawing for every insert in its RX series, with the hole diameter, insert length and minimum wall thickness. This bundle pairs ruthex's M2 to M5 assortment box, 270 lead-free brass inserts, with a seven-tip insert set and an adapter for 900M and T18 style soldering irons. ruthex says the opposing spiral knurls give balanced tightening and loosening torque, and its inserts are designed for thermoplastics such as PLA, PETG and ABS.
Maker and listing specifications
- 270 inserts: 70 × RX-M2x4, 100 × RX-M3x5.7, 50 × RX-M4x8.1 and 50 × RX-M5x9.5
- ruthex data sheet holes: 3.2 mm (M2), 4.0 mm (M3), 5.6 mm (M4) and 6.4 mm (M5)
- Tips for M2, M2.5, M3, M4, M5, M6 and M8 inserts, plus an adapter for 900M and T18 style irons
- ruthex: set the iron 10–15°C above the filament's hotend temperature
Watch out for
- The box has no M2.5 or M6 inserts, even though the tip set covers those sizes
- The tips need a 900M or T18 compatible iron; check your iron's tip system first
- The hole sizes apply to ruthex inserts only; other brands use different dimensions
Amazon buttons open Amazon.com search results for that exact product name in a new tab, not a single product page. Results can include other pack sizes, variants and similar items, so match the brand, sizes and quantity before you buy. Amazon affiliate links. As an Amazon Associate I earn from qualifying purchases.
Details from the ruthex RX-series data sheet and the ruthex Amazon.com listing.
Budget metric assortment
Ktehloy 400Pcs Metric Heat Set Insert Assortment Kit (M2–M6)
Best for: Stocking a drawer with lots of inserts for non-critical parts. Sizes: M2, M2.5, M3, M4, M5, M6.
If you mainly want a large number of inserts for brackets, organizers and enclosures, a no-name assortment is the cheapest way in. Ktehloy's kit puts 400 brass inserts in six metric sizes from M2 to M6 into one case. Its Amazon.com listing describes 45-degree knurling and a lead-in guide, so no countersink is needed, and says the inserts suit PLA, PETG, ABS, PPS and PP. The trade-off is documentation: the listing calls the sizes approximate and does not publish a hole chart, so measure one insert of each size with calipers and print a test hole before a real part.
Maker and listing specifications
- 400 brass inserts in M2, M2.5, M3, M4, M5 and M6
- Listing: 45-degree angled knurling with a built-in guide, no countersinking needed
- Listing: for PLA, PETG, ABS, PPS and PP, and withstands over 300°C
Watch out for
- The listing describes the sizes as approximate and gives no hole-size chart
- Inserts only: no tips or tools in the box
- We found no Ktehloy data sheet; every detail here comes from the Amazon.com listing
Amazon buttons open Amazon.com search results for that exact product name in a new tab, not a single product page. Results can include other pack sizes, variants and similar items, so match the brand, sizes and quantity before you buy. Amazon affiliate links. As an Amazon Associate I earn from qualifying purchases.
Details from the Ktehloy Amazon.com listing (no manufacturer data sheet found).
All-in-one starter kit
FFVRVSS 600+7Pcs Brass Threaded Inserts Kit (M2–M6) with Heat-Set Tips
Best for: First-timers who do not know yet which sizes they will use. Sizes: M2, M2.5, M3, M4, M5, M6.
For a first kit, the useful thing is having every common size and a matching tip in one labeled case, so you can try inserts without buying parts one at a time. FFVRVSS's kit includes 600 lead-free brass inserts in six sizes from M2 to M6, six heat-set tips and one soldering iron adapter, with each size in its own labeled compartment. Its listing describes opposing spiral knurling and a lead-in guide and names PLA, PETG, ABS, TPU, PPS and PP. You still need your own soldering iron, and like most budget kits it has no published hole chart.
Maker and listing specifications
- 600 lead-free brass inserts in M2, M2.5, M3, M4, M5 and M6
- Six heat-set tips (M2 to M6) and one soldering iron adapter
- Each size in its own labeled compartment
- Listing: for PLA, PETG, ABS, TPU, PPS and PP
Watch out for
- Soldering iron not included
- The listing does not say which irons the adapter fits; confirm before ordering
- No published hole-size chart, so measure an insert and print a test hole
Amazon buttons open Amazon.com search results for that exact product name in a new tab, not a single product page. Results can include other pack sizes, variants and similar items, so match the brand, sizes and quantity before you buy. Amazon affiliate links. As an Amazon Associate I earn from qualifying purchases.
Details from the FFVRVSS Amazon.com listing (no manufacturer data sheet found).
Single-size tapered brass inserts
Initeq M3-0.5 Threaded Heat Set Inserts for 3D Printing (Long)
Best for: Repeat projects that use one size, such as M3 electronics enclosures. Sizes: M3-0.5 (one size per pack).
When you use one size over and over, it is worth buying inserts from a maker that publishes the exact hole to model. Initeq's Durathread M3 inserts are machined from CDA 360 free-machining brass, and Initeq lists the overall length, outside diameter and recommended hole size on its product page. The long version is the one Initeq suggests for thicker walls and higher-stress joints. Initeq also gives its own installation guidance: an iron at 200–230°C, a few seconds of heat before pressing, and a hole slightly deeper than the insert.
Maker and listing specifications
- M3-0.5 thread, CDA 360 free-machining brass
- Long version: 0.250 in (6.35 mm) long, 0.220 in (about 5.6 mm) outside diameter
- Initeq recommended hole: 0.206 in (about 5.2 mm), about 0.030 in (0.8 mm) deeper than the insert
- Initeq: iron at 200–230°C; let the insert heat for 2–3 seconds before pressing
Watch out for
- Wider than ruthex-style M3 inserts, so the two need different hole sizes
- One size per pack and no tips included
- Initeq says its inserts are not for resin prints
Amazon buttons open Amazon.com search results for that exact product name in a new tab, not a single product page. Results can include other pack sizes, variants and similar items, so match the brand, sizes and quantity before you buy. Amazon affiliate links. As an Amazon Associate I earn from qualifying purchases.
Details from the Initeq Durathread M3-0.5 product pages and the Initeq Amazon.com listing.
Temperature-controlled soldering station
Hakko FX-888DX Digital Soldering Station (FX888DX-010BY)
Best for: Anyone installing inserts regularly who wants to set and hold a temperature. Sizes: Takes Hakko T18 tips.
For inserts, accurate temperature control matters more than raw power: too hot and the plastic strings, discolors or flows into the threads; too cool and the insert will not sink without force. A temperature-controlled station lets you dial in a setting for each material and keep it there. Hakko lists the FX-888DX with a 50–480°C range, ±1°C stability at idle between 200 and 480°C, and a 65 W FX-8801 iron with a ceramic heater. It uses Hakko's T18 tip series, which many heat-set tip sets list as compatible.
Maker and listing specifications
- Hakko: 50–480°C temperature range
- Hakko: ±1°C stability at idle when set between 200 and 480°C
- FX-8801 iron: 65 W ceramic heater, T18 series tips
- Amazon.com listing: 120 V US model, ships with a T18-D16 chisel tip
Watch out for
- No insert tips in the box; add a set listed for T18 or 900M style irons
- Hakko's manual says to use genuine Hakko parts, so third-party insert tips are outside Hakko's guidance
- It is a full bench station, more than you need for a handful of inserts a year
Amazon buttons open Amazon.com search results for that exact product name in a new tab, not a single product page. Results can include other pack sizes, variants and similar items, so match the brand, sizes and quantity before you buy. Amazon affiliate links. As an Amazon Associate I earn from qualifying purchases.
Details from the Hakko FX-888DX specifications and instruction manual, and the Hakko Amazon.com listing.
Heat-set insert tip set
HANGLIFE Heat-Set Insert Tips M2, M2.5, M3, M4, M5, M6, M8
Best for: People who already own a compatible soldering iron. Sizes: M2, M2.5, M3, M4, M5, M6, M8.
If you already have a temperature-controlled iron, a dedicated tip set is the cheapest upgrade for installing inserts. A tip sized to the insert sits inside its bore, which helps keep the insert straight and keeps the iron off the surrounding plastic. HANGLIFE's set covers seven sizes from M2 to M8 in brass, and its Amazon.com listing names Weller SP40NUS, Hakko FX-888D, 900M and T18 style irons as compatible. The Hakko FX-888DX above uses the same T18 tip series as the FX-888D.
Maker and listing specifications
- Seven brass tips: M2, M2.5, M3, M4, M5, M6 and M8
- Listing: compatible with Weller SP40NUS, Hakko FX-888D, 900M and T18 style irons
- Listing: designed for pressing heat-set inserts into 3D printed parts
Watch out for
- Compatibility comes from the listing; check your iron's tip system before buying
- The listing does not name TS100 or Pinecil style irons; Pine64 sells its own insert tip set for the Pinecil
- Tips stay as hot as the iron; let them cool before swapping sizes
Amazon buttons open Amazon.com search results for that exact product name in a new tab, not a single product page. Results can include other pack sizes, variants and similar items, so match the brand, sizes and quantity before you buy. Amazon affiliate links. As an Amazon Associate I earn from qualifying purchases.
Details from the HANGLIFE Amazon.com listing.
M2, M3, M4 and M5 Sizes
The thread size tells you which screw fits; it does not tell you the hole size, because each brand makes its inserts a different shape. The table compares the hole diameters two insert makers publish for their standard lengths. The minimum wall is the plastic ruthex wants around the hole on every side.
M2
Small sensors, tiny circuit boards, light covers
ruthex: RX-M2x4: 3.2 mm hole, 4.0 mm long
CNC Kitchen: M2x3: 3.2 mm hole
Min. wall (ruthex): 1.3 mm
M2.5
Single-board computers and many small electronics boards
ruthex: RX-M2.5x5.7: 4.0 mm hole, 5.7 mm long
CNC Kitchen: M2.5x4: 4.0 mm hole
Min. wall (ruthex): 1.6 mm
M3
The everyday size: enclosures, printer parts, fan mounts, lids
ruthex: RX-M3x5.7: 4.0 mm hole, 5.7 mm long
CNC Kitchen: M3x5.7: 4.0 mm hole
Min. wall (ruthex): 1.6 mm
M4
Brackets, handles, mounts that carry real load
ruthex: RX-M4x8.1: 5.6 mm hole, 8.1 mm long
CNC Kitchen: M4x8.1: 5.7 mm hole
Min. wall (ruthex): 2.1 mm
M5
Heavier mounts and parts that bolt to aluminum extrusion
ruthex: RX-M5x9.5: 6.4 mm hole, 9.5 mm long
CNC Kitchen: M5x9.5: 6.5 mm hole
Min. wall (ruthex): 2.6 mm
The two charts agree on M2 and M3 and differ by 0.1 mm on M4 and M5, which is exactly why you should model from the drawing for the brand you bought. Initeq's M3 inserts are wider still and call for a 0.206 in (about 5.2 mm) hole. Budget kits rarely publish a chart at all: measure the narrow lead-in end of one insert with calipers and use that as a starting hole size for a test print.
Which size should you stock? M3 covers most hobby projects, so buy plenty. Add M2.5 if you mount electronics boards, M4 and M5 for brackets and heavier parts, and M2 only if you work with very small hardware. Many makers also sell short versions of each size for thin walls.
Inserts for PLA, PETG and ABS
Heat set inserts work in any thermoplastic filament, because the plastic only has to soften and flow around the knurls. The insert makers give their temperature advice relative to the filament, so start from the temperature you actually print that spool at.
PLA
Starting point: Iron a little above your PLA print temperature (ruthex: +10–15°C; CNC Kitchen: +10–20°C)
Softens at a low temperature, so it is easy to overheat. Press gently, stop before the insert is flush and let the part cool fully before loading a screw.
PETG
Starting point: Same rule, starting from your PETG print temperature
Molten PETG is stringy and sticks to the tip. Wipe the tip between inserts and clear any plastic from the threads before it hardens.
ABS and ASA
Starting point: Same rule, starting from your ABS or ASA print temperature
Both take inserts well. Heating them gives off fumes, so work with ventilation, as you would when printing them.
Nylon and carbon-fiber blends
Starting point: Follow the filament maker's print temperature and test on a scrap part
Higher-temperature materials need a hotter iron. Dry nylon first, and add walls around the hole in filled materials, which can be more brittle.
The display on a soldering iron shows the heater temperature, and a large brass insert tip draws heat away, so treat any number as a starting point. Adjust by what you see: stringing, smoke or a glossy, sunken ring around the hole means too hot; an insert that needs real force means too cool.
Installation Temperatures and Technique
The makers agree on the method: heat the insert, let the plastic do the work, and do not force it. These steps combine their guidance.
- 1Fit the right tip. Use an insert tip that matches the insert size, and let the iron reach temperature with the tip installed.
- 2Set the temperature. Start 10–20°C above the filament's print temperature (ruthex says 10–15°C; CNC Kitchen 10–20°C), or 200–230°C for Initeq inserts.
- 3Seat the insert. Place the insert in the hole, narrow end down, and check it sits straight. Most inserts have a lead-in that centers them.
- 4Heat before you push. Rest the tip in the insert and wait. Initeq suggests 2–3 seconds before pressing; the insert should start to sink under light pressure.
- 5Press slowly and straight. Guide it down without tilting. Pressing hard or fast shoves melted plastic ahead of the insert and can push it in crooked.
- 6Stop short and finish flush. CNC Kitchen recommends melting the insert in about 90% of the way with the iron, then pressing the last bit flush with a flat, cool surface so it ends up level.
- 7Let it cool. Leave the part alone until the plastic hardens before you load a screw. Clear any plastic from the threads with a screw while it is still warm, not with the iron.
Doing more than a few? A simple jig or a drill-press-style insert press holds the iron vertical, which makes straight inserts much easier on large batches. For a handful of inserts, a steady hand and an insert tip are enough.
Hole Sizing and Print Orientation
Most insert failures start in the design, not at the iron. Get the hole right and installation is easy.
Diameter
Model the hole from the insert maker's drawing for the exact part number. FDM printers often print holes slightly undersized, so print a small test block with a few diameters around the recommended size before committing to a long print.
Depth
Make blind holes deeper than the insert. CNC Kitchen calls for at least the insert length plus 1 mm; Initeq suggests about 0.8 mm extra. The displaced plastic needs somewhere to go, or it pushes back up into the threads.
Wall thickness
Keep at least the maker's minimum wall around the hole (ruthex: 1.6 mm for its standard M3). In the slicer, add perimeters so the material around the insert is solid plastic rather than infill.
Orientation
Holes printed vertically, with their axis straight up from the bed, come out round and need no supports. Horizontal holes print slightly oval with a sagging top, so avoid them for inserts or add a small teardrop or flat to the top of the hole.
Think about the load as well. A screw that pulls straight out along the insert relies on the plastic gripping the knurls, while a sideways load levers on the surrounding wall. Thicker bosses, more perimeters and a longer insert all help in both cases.
Pull-Out Resistance and Common Mistakes
How well an insert holds depends on the insert's length and knurl pattern, how much solid plastic surrounds it, whether the hole was sized correctly and whether the plastic flowed fully around the knurls. ruthex credits its opposing spiral knurls with balanced resistance to both tightening and loosening torque, and Initeq recommends its long inserts for higher-stress joints. We do not publish pull-out figures because the makers do not publish comparable ones, and results depend heavily on your part and material.
Hole too large
The knurls barely engage and the insert spins or pulls out
Fix: Model from the maker's drawing and print a test hole
Hole too small
You need force, the insert goes in crooked and plastic bulges around it
Fix: Open the hole slightly or raise the iron temperature a little
Iron too hot
Plastic strings, discolors and flows into the threads
Fix: Lower the temperature and press more slowly
Pushing too hard
The insert tilts and plastic piles up ahead of it
Fix: Let the heat sink it; use light pressure only
Blind hole too shallow
Displaced plastic fills the threads or stops the insert short
Fix: Make the hole at least the insert length plus 1 mm
Thin walls or infill around the hole
The boss cracks or the insert rips out a plug of plastic
Fix: Add perimeters and keep at least the minimum wall
Using a pointed soldering tip
The insert goes in crooked and the iron touches the part
Fix: Use an insert tip sized to the insert
Loading the screw while warm
The insert shifts before the plastic sets
Fix: Let the part cool fully first
🧴 Joining printed parts without screws?
When a part never needs to come apart, glue can be simpler. Our glue guide compares super glue and epoxy for PLA and other filaments.
Buying Guide
Published dimensions. The most useful thing an insert maker can give you is a drawing with the hole size, length and minimum wall. Brands such as ruthex, CNC Kitchen and Initeq publish them; most budget assortments do not.
Assortment or single size. Buy an assortment while you learn which sizes you use, then buy single-size packs of the ones you run out of, usually M3.
Standard or short length. Standard-length inserts hold better in thick walls; short versions suit thin panels and lids where a long insert would break through.
Knurl pattern. Inserts with opposing spiral or diagonal knurls are designed to resist turning in both directions. Straight-knurled inserts made for molding still work, but rely on a well-sized hole.
Lead-free brass. Brass conducts heat well, which makes installation quicker. Several makers, including ruthex and FFVRVSS, specify lead-free brass.
Tips that fit your iron. Check your iron's tip system before buying tips: T18 and 900M style irons, Weller ST style irons and pen irons such as the Pinecil and TS100 all use different fittings.
Temperature control. Any temperature-controlled iron works. A basic iron without temperature control can run hotter than PLA needs, which makes clean inserts harder.
Safety
Installing inserts means a hot iron and melting plastic. Read the manual for your iron.
Burns
Insert tips and fresh inserts stay hot for some time. Use the iron's stand, change tips only when cool, and never test an insert's temperature by touch.
Fumes
Hakko's manual notes that soldering produces smoke and calls for a well-ventilated area. Melting ABS, ASA and other plastics also gives off fumes, so ventilate as you would when printing them.
Fire
Return the iron to its stand between inserts, keep it away from filament spools and paper, and switch it off when you finish.
Eyes
Wear eye protection if you clear threads or trim plastic while it is hot.
Frequently Asked Questions
What are the best heat set inserts for 3D printing?
For most people, a brand-name kit with a published hole chart, such as the ruthex M2 to M5 assortment with its insert tips, is the best place to start. Choose a budget assortment such as Ktehloy's for lots of non-critical parts, and single-size inserts such as Initeq's M3 when you build the same kind of part repeatedly.
What size hole do I need for an M3 heat set insert?
It depends on the insert, not just the thread. ruthex specifies a 4.0 mm hole for its RX-M3x5.7, CNC Kitchen also lists 4.0 mm for its M3x5.7, and Initeq recommends 0.206 in (about 5.2 mm) for its wider M3 inserts. Use the drawing for the exact insert you bought and print a test hole first.
What temperature should I use for heat set inserts?
Start a little above the temperature you print the filament at. ruthex suggests 10–15°C above the filament's hotend temperature, CNC Kitchen suggests 10–20°C above the printing temperature, and Initeq gives 200–230°C for its inserts. If the plastic strings or smokes, lower it; if the insert will not sink without force, raise it.
Do heat set inserts work in PLA?
Yes. ruthex, Initeq and the budget kits all list PLA. PLA softens at a lower temperature than PETG or ABS, so use a lower iron setting, press gently and let the insert cool in place before you load a screw.
Can I install heat set inserts with a normal soldering tip?
You can, but a dedicated insert tip is easier. A normal pointed tip sits on top of the insert and can push it in crooked or touch the plastic. An insert tip fits inside the insert's bore, which keeps it straight and keeps heat on the brass.
How deep should the hole be for a heat set insert?
Deeper than the insert, so displaced plastic has somewhere to go. CNC Kitchen's guidelines call for a blind hole at least the insert length plus 1 mm, and Initeq suggests about 0.030 in (0.8 mm) deeper than its insert.
Are heat set inserts better than screwing into plastic?
For parts you will take apart more than once, yes. Brass threads stand up to repeated assembly far better than threads cut into plastic, and machine screws give a predictable clamping force. For a part you assemble once, a self-tapping screw into a properly sized hole can be enough.
Can you use heat set inserts in resin prints?
Not by heat-setting. Cured resin does not melt the way thermoplastic filament does, and Initeq says its inserts are not for resin prints. In resin parts, inserts have to be glued into the hole instead.
The Bottom Line
Start with a kit whose maker publishes hole sizes. The ruthex M2–M5 assortment with insert tips covers the common sizes and tells you exactly what hole to model. Choose Ktehloy if you mainly want a lot of inserts cheaply, FFVRVSS if you want every size and a tip in one box, and Initeq single-size packs once you know which size you use most.
Install them with a temperature-controlled iron such as the Hakko FX-888DX, or add a tip set such as HANGLIFE's to an iron you already own. Set it a little above the filament's print temperature, model the hole from the drawing, and let heat, not force, set the insert.
Start With These
One insert kit, one way to heat them, one set of tips.
Amazon buttons open Amazon.com search results for that exact product name in a new tab, not a single product page. Results can include other pack sizes, variants and similar items, so match the brand, sizes and quantity before you buy. Amazon affiliate links. As an Amazon Associate I earn from qualifying purchases.
How We Chose These Products
We started from what people need to add threads to printed parts: a first kit, a cheap bulk supply, a reliable single size, a way to control temperature and tips that fit a common iron. For each job we picked a specific product sold on Amazon.com, preferring brands that publish dimensions and installation guidance, and on November 20, 2026 we confirmed that each one is listed on Amazon.com under the name the button searches for.
Hole sizes, temperatures and specifications come from ruthex, CNC Kitchen, Initeq and Hakko documentation, or from the Amazon.com listing where a brand publishes nothing else. We do not claim to have tested these products, and we do not publish prices, star ratings or pull-out measurements.
Affiliate Disclosure: This post contains affiliate links. If you purchase through these links, we may earn a small commission at no extra cost to you. We only recommend products we stand behind. See our full disclosure for details.
As an Amazon Associate I earn from qualifying purchases.